Materials
Loom: Knifty Knitter Long Blue Loom or any other loom with a
½ inch gauge
Yarn: 180grams/250yds of Bulky weight merino yarn. Sample
was knit in Knit Picks Swish Bulky in Flamingo color (2 skns). 2 yds of
contrasting color yarn for Lazy Daisy embroidery.
Notions: Tapestry Needle, Knitting Tool, 1 pearl bead size 6mm
Gauge: 12sts x 20 rows=4 inches in stockinette stitch
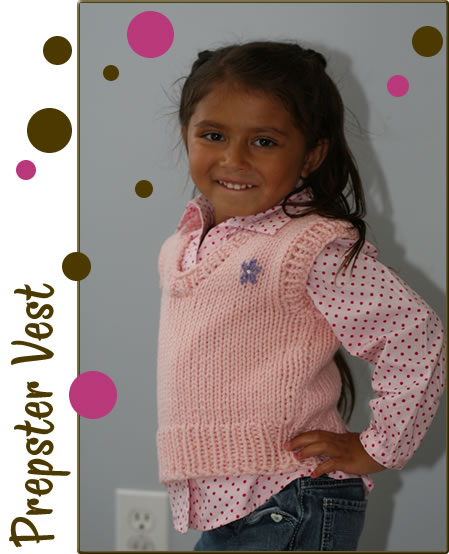
Size: 4T (shown).
Finished Measurements (snug fit):
Chest: 24 inches
Body Length: 12.5 inches

Normal
0
MicrosoftInternetExplorer4
/* Style Definitions */
table.MsoNormalTable
{mso-style-name:”Table Normal”;
mso-tstyle-rowband-size:0;
mso-tstyle-colband-size:0;
mso-style-noshow:yes;
mso-style-parent:””;
mso-padding-alt:0in 5.4pt 0in 5.4pt;
mso-para-margin:0in;
mso-para-margin-bottom:.0001pt;
mso-pagination:widow-orphan;
font-size:10.0pt;
font-family:”Times New Roman”;}
DIRECTIONS
Tip: Recommend using a Row Counter throughout to keep track of rows.
Back
- Cast
on 34sts, be sure yarn ends so first row is worked from right to left. - Work
in k1, p1 rib for 11 rows. - Next row:
Increase 2 stitches at each end as follows: move the first two stitches and the last 2
stitches outwards so you have the following: Peg with stitch, empty peg,
peg with stitch, empty peg, middle pegs with stitches, when you reach the
last two pegs, move them outwards to have empty peg, peg with stitch,
empty peg, peg with stitch. Work the entire row in knit stitch (38sts) - Body: Continue
in stockinette stitch (knit all rows) for 26 rows - Armhole
shaping: Bind off 2sts at beginning of next 2 rows (34sts) - Next
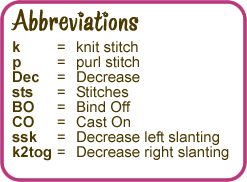
row: ssk, knit to the last 2sts, k2tog (32sts) - Work
in stockinette stitch (knit stitch) for another 24 rows. - Neck
shaping: Bind off 9sts at beginning of next two rows. - Bind
off loosely the remaining 14sts
Front
(Recommend to use a row
counter to keep track of shoulder shaping rows)
- Follow
instructions as for Back until step 6 of Back. - Divide
for V neck, you will work both sides at the same time (recommend to attach
another ball of yarn) - Next: k15, attach ball of yarn at
peg 16, bind off peg 16 and 17 (2 stitches bound off), continue working in knit
stitch to the end of row. - Neckline
Shaping—work both sides at the same time: Dec 1 stitch at neck edge on
next row. Work 2 rows even. Dec 1 stitch on following row. Dec 1 stitch at
neck edge every 4th row, 4 times, until 9 stitches remain. - Work
even until you have completed 24 rows from beginning of shoulder shaping. - Bind
off loosely remaining 9 stitches.
Armbands (make 2)
- Cast
on 34sts - R1-3:
*k1, p1; rep from * to the end of row - Bind
off loosely
Neckband
- Cast
on 38sts - R1-3:
*k1, p1; rep from * to the end of row - Bind
off loosely
ASSEMBLY
- Steam
block all pieces - Seam
as follows: sew fronts to back along shoulder seams. Sew side seams. Sew
the arm bands and neckline band edges - Weave
in all ends
LAZY DAISY INSTRUCTIONS
Thread tapestry needle with contrasting color yarn. Locate the place where you want the lazy daisy and embroider one daisy. Need instructions? follow this link to About.com to find easy instructions with step by step pictures.
Once completed, thread a regular sewing needle with white color thread. Secure the pearl bead to the center of the daisy.
Make it your own: Change the color of the vest. Make it striped by adding horizontal stripes to it. Don’t want a daisy, embroider another shape.
I am currently working on the math for other sizes: 2T and 3T
![]()
Previous Free Monthly Patterns:
August ’09: Hourglass Beanie


Ok I may get brave and try making this for my son (in a different color of course. I am still not to sure about some of the instructions so I may be taking it apart a few times 🙂
LikeLike
hello isela, i have purchased the yarn to make this vest and have the kniffty knitter blue long loom, but it only has 30 pegs, is there another one that has more pegs, since the patterns says to cast on 34 stitchs and then it increases several more stitches. thanks can’t wait to make it. jean
LikeLike
Hi Isela. I just bought your book Loom Knitting primer and have the knifty knitters. I am have trouble following the stockinette stitch. How many times to i go around the loom before i pull the botttom stitches over with the crochet hook.
Thaks Kathy
LikeLike
It depends which stitch you are doing. If you are doing the single stitch you first go around the loom twice then you lift the bottom loop off the pegs. If you are doing the double stitch, you go around the loom three times, then you lift the bottom loop off the pegs.* Next, you wrap around 1 time for either one of the stitches, then you lift the bottom loop off. You repeat from * until you have the desired length.
The above is for the twisted knit stitch/e-wrap. If you doing the Knit Stitch, you only wrap the foundation row then you knit the stitches one by one.
Isela Phelps
typepad@sixapart.com wrote:
LikeLike
Sorry to be a pain but it just says do the entire project it stockinette and says nothing about single ir double it os for an afghan.http://www.lionbrand.com/patterns/kb-afghan.html?r=1&r=1&r=1
There is the link. Also are the stockinbette and the ewrap the same stitch?
Thanks
Kathy
LikeLike
I love this pattern! How many stitches would you recommend I decrease it to make size 3 and increase to make a 6
Thanks for proving these great patterns. I hope to make this for my 2 granddauters.
Melissa
LikeLike