In an effort to build some of the patterns in the video library, I will be creating some basic patterns and uploading the patterns to YouTube. The Garter Stitch Beanie is pretty basic when it comes to instructions, and you can change it up easily to adapt it to other sizes/knitting looms. The video and pattern were created using the KB Looms Flexee Loom Chunky.
A brief note about my patterns: they are free of charge. Yes, you can use the pattern to create items to sell. Feel free to link to the pattern from your blog–why a link? Just in case I update the pattern with extra information or information that I forgot to add.
PATTERN
ABBREVIATIONS
K=knit stitch (u-stitch, or true knit stitch recommended)
P=purl stitch
SSK=direct translation from needle knitting, it stands for “slip one, slip one, knit two together”. The decrease slants to the left on the knit side of the work.
Sts=stitches
Rnd(s)=Round(s)
Rep=Repeat
Approx=approximately
MATERIALS
Loom: Flexee Loom Chunky Links, 22 links (44 pegs).
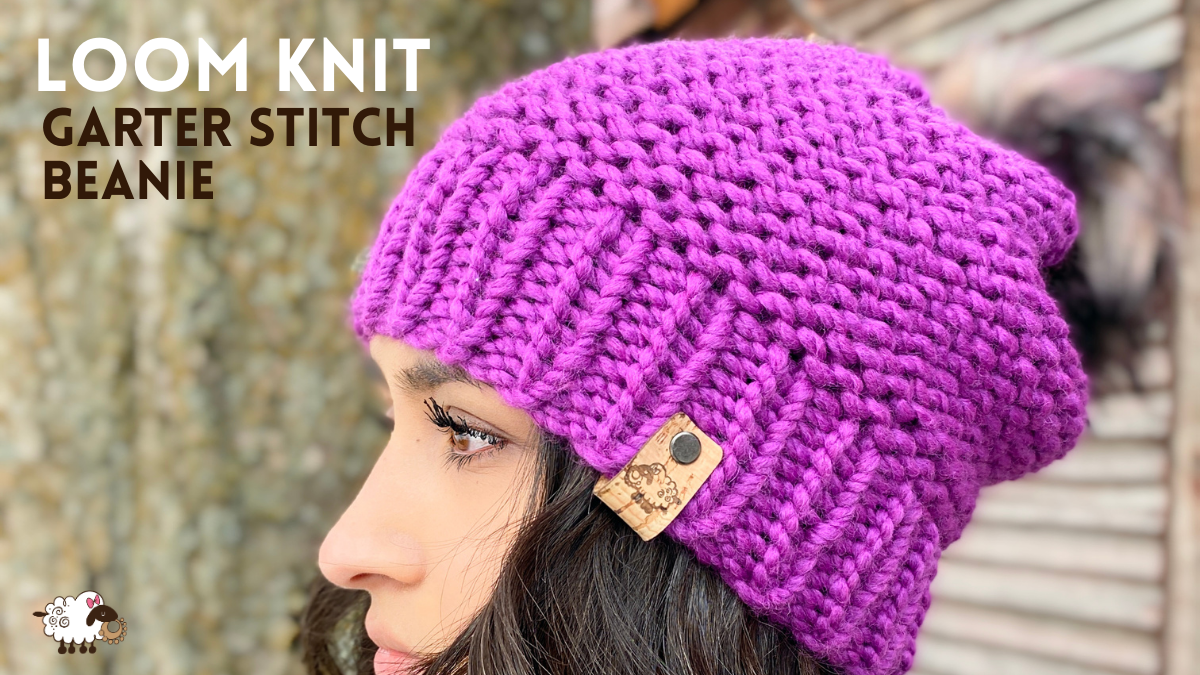
Yarn: Approximately 90 yards of bulky weight yarn. Sample was worked with Lion Brand Wool-Ease Thick & Quick in Lollipop.
Notions: Knitting tool, tapestry needle, scissors, row counter (optional).
Gauge: 5 sts x 8 rows=2 inches in single ribbing.
Size: Fits a head circumference up to 21″ (using the loom above and the yarn specified above).
WAIT, WAIT….I don’t have the above loom, what other loom can I use?
If you don’t have the Flexee Loom Chunky and you want to use Bulky weight yarn, you can use any other large gauge knitting loom that is close in loom gauge. If you want to use a different loom gauge, then I suggest using the loom that creates a hat that is the desired size and yarn weight suitable for that loom gauge.The decreases at the top of the crown may not be feasible if you are using a loom that doesn’t allow you to remove links or move sliders down–in this case, work until the hat is about 7.5 inches in length (length will vary depending on size of hat you are creating), then bind off with the gather removal method.
Note: the combination of the loom gauge and the yarn you use will determine the size of your hat. If you use a different loom and a different yarn, your gauge may be completely different than the one I obtained. Please adjust accordingly to fit your needs.
INSTRUCTIONS

Assemble 22 Flexee Chunky Links into a circular configuration to work in the round.
Cast on 44 sts, join to work in the round.
Round 1-10: *k1, p1; rep from * to end of rnd. (Approx 2.5″)
Round 11: k to end of rnd.
Round 12: p to end rnd.
Repeat Rounds 11 and 12 until hat measures approx 7″ from cast on edge. (The ridges created by these two rounds is what is known as “garter stitch”).
Next round: *ssk; rep from * to end of rnd.
Next round: p to end of rnd.
Next round: *ssk, rep from * to end of rnd.
Bind off with gather removal method. Weave all ends in.
Gently tug vertically on the hat to set the stitches.

VIDEO
Garter Stitch Bits of Knowledge
The garter stitch in the round or flat (only in loom knitting) is created by alternating a knit round/row (any kind of knit stitch) and a purl round/row. In needle knitting, when knitting a flat panel, the garter is created by working the knit stitch both on the right side and wrong side rows.
The garter stitch creates a ridged texture fabric. These ridges create a thick fabric that doesn’t curl-it lies flat. Typically, you will see this texture around the edges of blankets, scarves, shawls as it prevents the edges from curling in. Another great characteristic of the garter stitch–it is reversible! Both sides will look the same.
