Thinking of getting started with loom knitting?

It was almost 23 years ago when I went deep into the art of loom knitting. Now, it seems like something I have been doing for almost my entire life. Up to that point, my expertise was in regular knitting and crochet. But I do remember playing with a little 4-peg corker as a child. I am often asked why loom knitting? If you know how to knit with traditional knitting needles, why switch to loom knitting? For me, it was more of a default task when my hubby started a loom knitting manufacturing company. Since I had knowledge of traditional knitting, the responsibility fell on my lap to create some basic instructions to send out with the product.

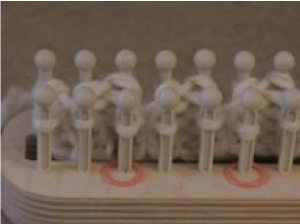
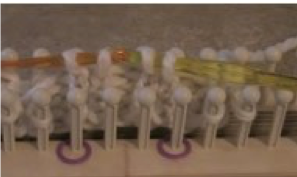
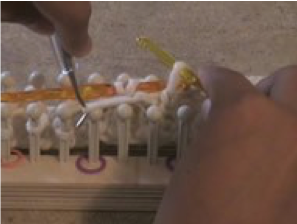
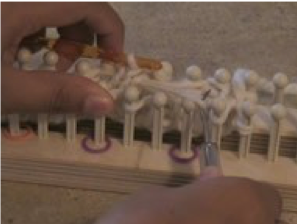
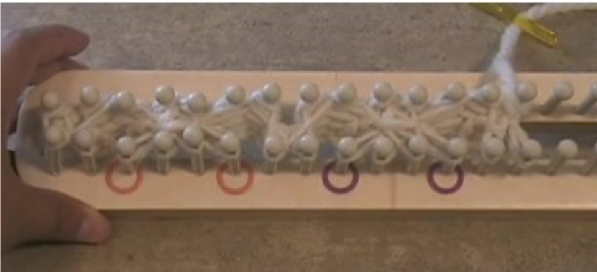
Now, my advice to others wanting to learn to knit is simply: Loom knitting offers a delightful entry point into the world of knitting, making it an ideal choice for beginners eager to explore the craft. Unlike traditional knitting with needles, loom knitting simplifies the process by using a circular or rectangular loom with pegs to create stitches. It is very, very hard to drop stitches on a loom. Your tension will most likely remain the same throughout the project. One of the joys of loom knitting lies in its accessibility; the technique requires minimal dexterity and coordination, making it suitable for individuals of all ages and abilities. With just a few basic techniques, beginners can quickly produce a variety of projects, from cozy scarves and hats to plush blankets and socks, fostering a sense of accomplishment and satisfaction.

Moreover, loom knitting offers a tactile and therapeutic experience that promotes relaxation and mindfulness. As the soft yarn glides effortlessly over the loom, knitters find solace in the rhythmic repetition of stitches, allowing them to unwind and destress from the demands of daily life. The simplicity of loom knitting also encourages creativity and experimentation, empowering beginners to explore different yarn textures, colors, and stitch patterns without the intimidation often associated with traditional knitting. With its gentle learning curve and therapeutic benefits, loom knitting provides a fulfilling and enjoyable journey for novices embarking on their knitting adventures.


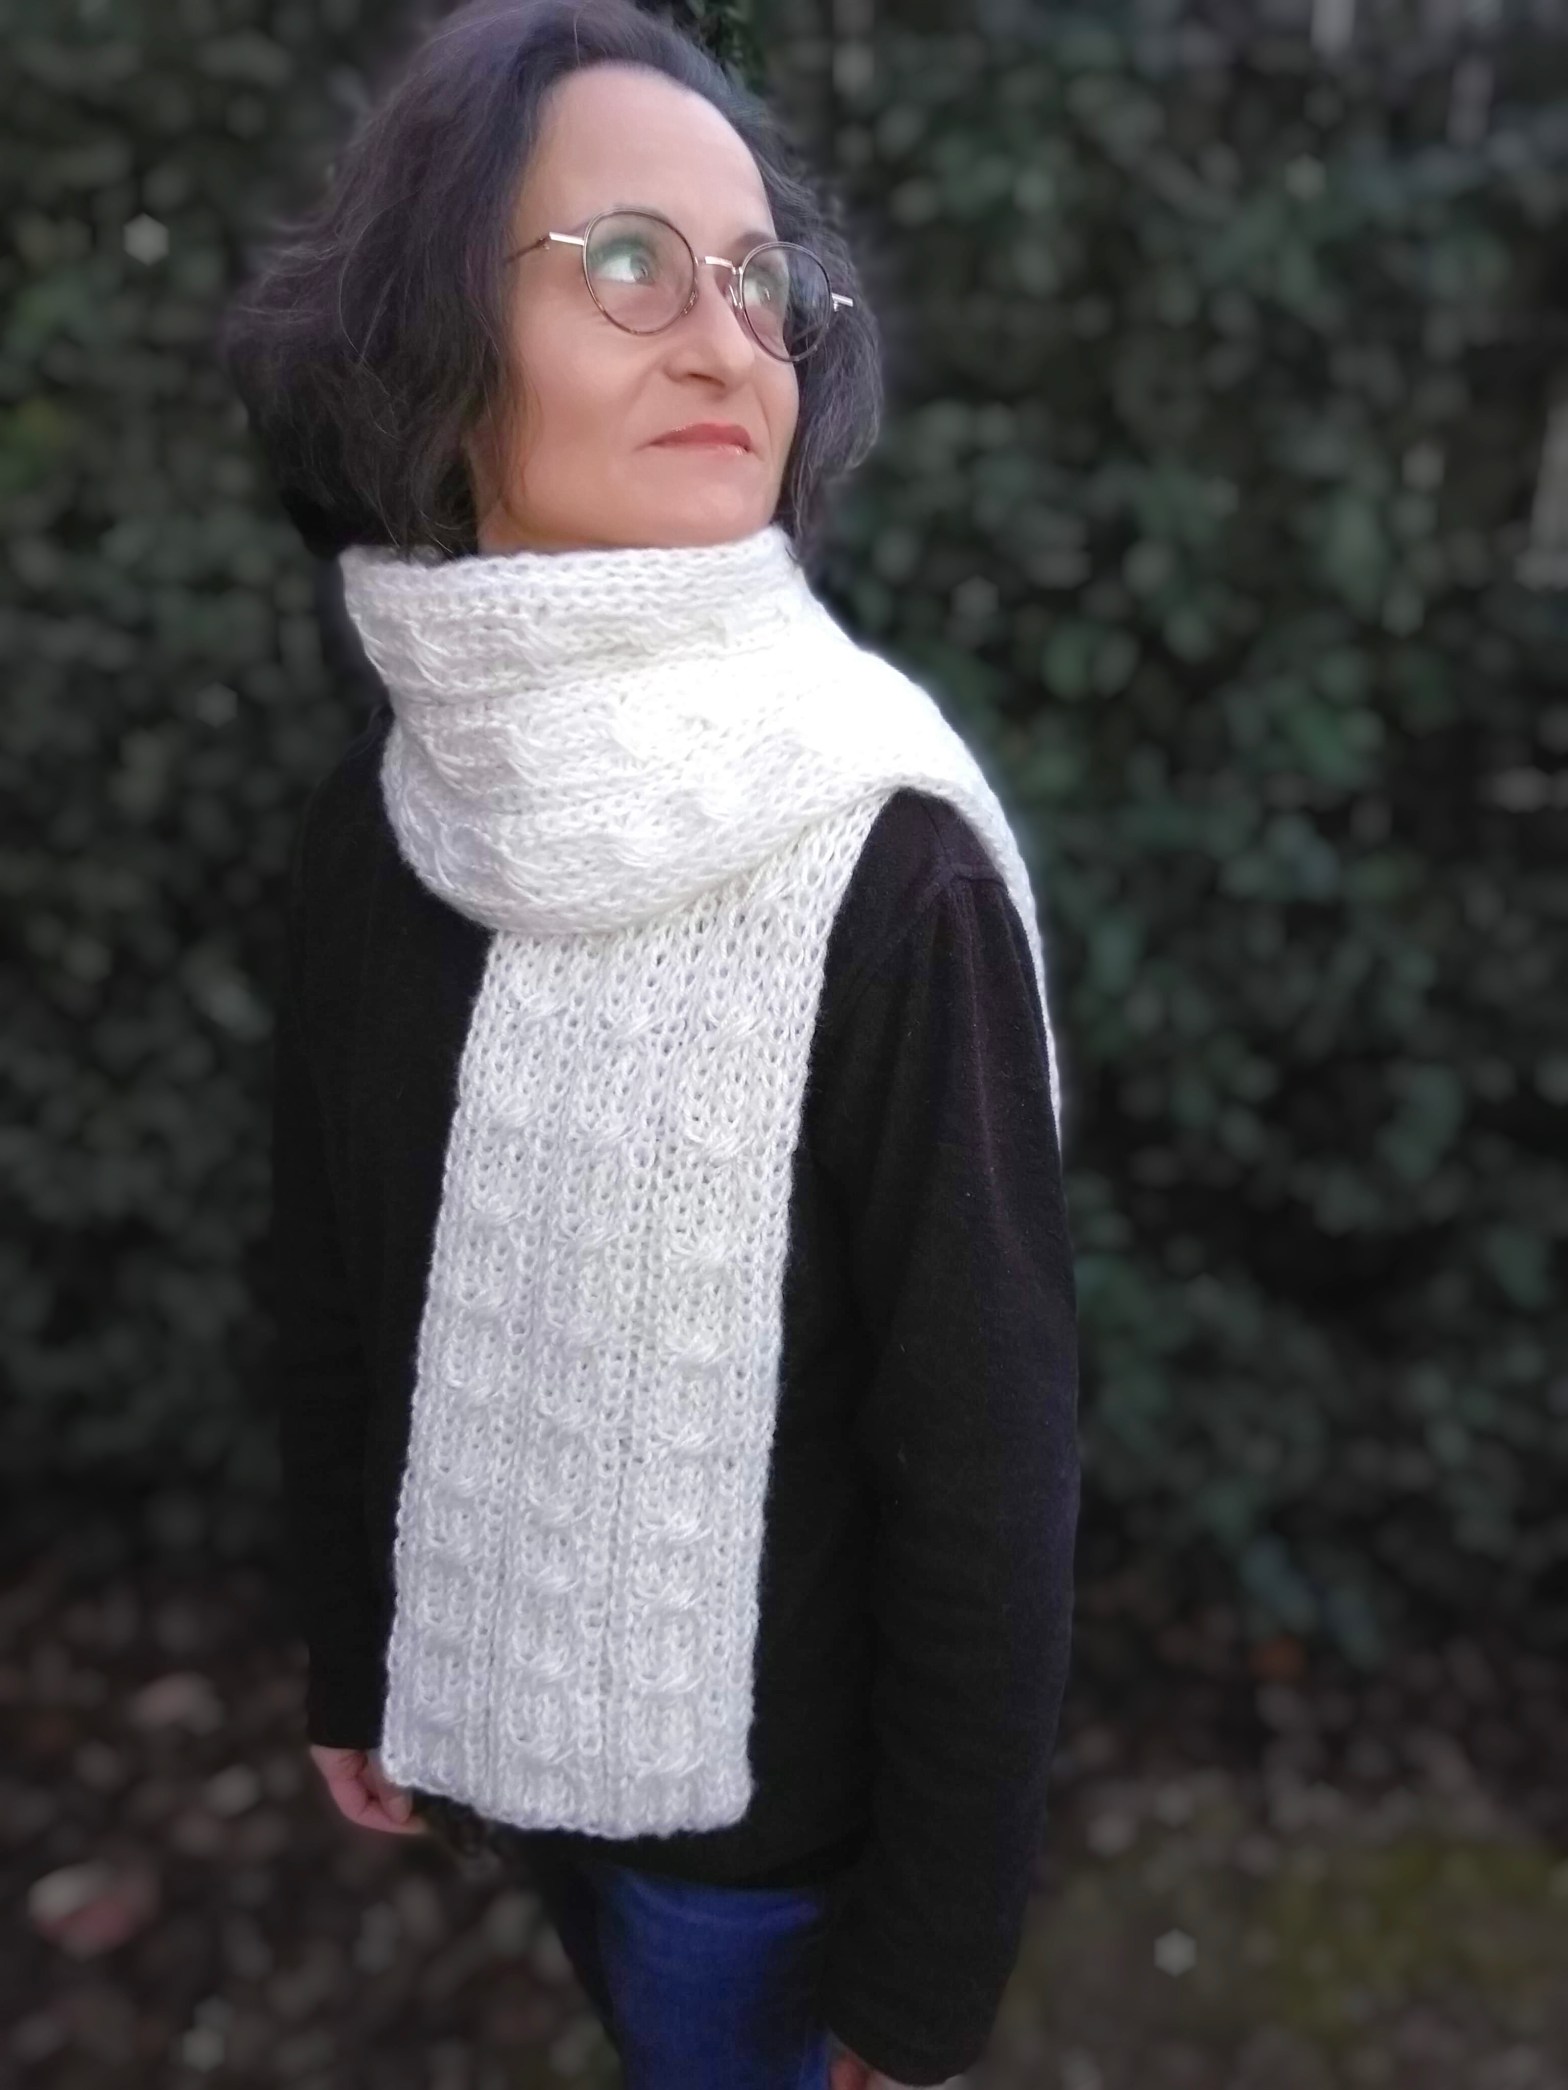
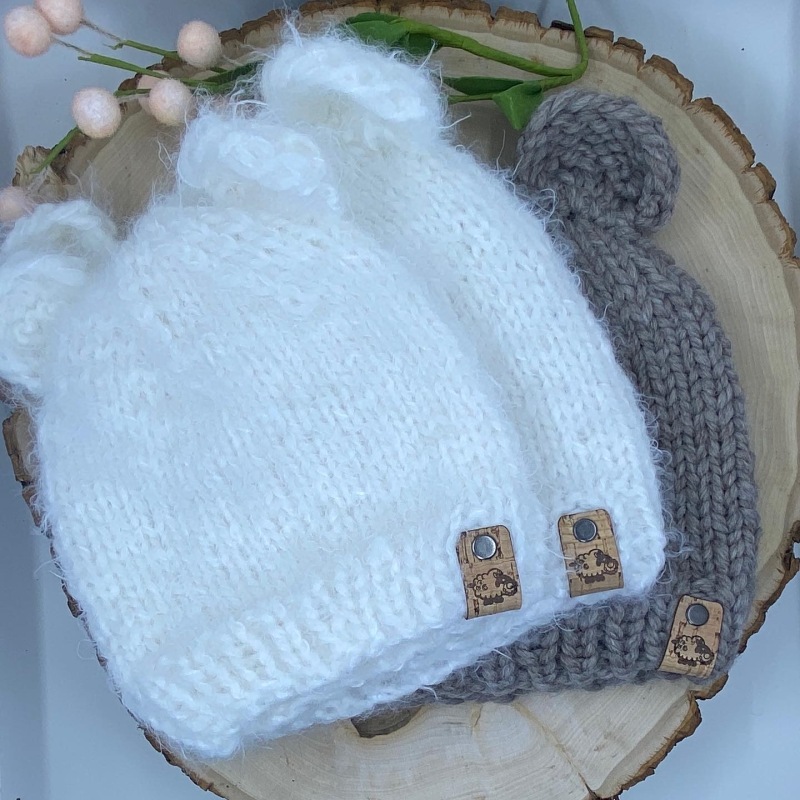
Although I have been loom knitting now for what seems like a lifetime, I still receive tremendous joy when I create something unique with a loom. Seeing pattern ideas come to life gives purpose especially when knowing that sharing these creations will spark a light in others.

CCD: Center Double Decrease

Also known as Centered Double Decrease, or Central Double Decrease.

It is a double decrease that reduces 3 stitches down to 1 stitch. As with other decreases, one stitch will remain visible when decreasing while the other 2 stitches remain hidden behind the main stitch. The CDD is a vertical decrease in which the two stitches adjacent to the center stitch are hidden behind the center stitch. The first and the third stitch merge into the center stitch creating a vertical center column/ridge.

SSK

Rediscover the magic of our content! For those new to our blog, we believe in the power of resharing. Dive into our treasure trove of articles, videos, and insights that have wowed countless readers. Whether it’s a loom knitting tutorial, an intriguing new loom video, or a a new technique, we know that great content deserves a second, third, or even fourth look.

Today, we are resharing information on decreases, specifically the SSK.

SSK instructions

K2TOG

Rediscover the magic of our content! For those new to our blog, we believe in the power of resharing. Dive into our treasure trove of articles, videos, and insights that have wowed countless readers. Whether it’s a loom knitting tutorial, an intriguing new loom video, or a a new technique, we know that great content deserves a second, third, or even fourth look.

Today, we are resharing information on decreases, specifically the K2TOG.

Sl1-K1-PSSO

Rediscover the magic of our content! For those new to our blog, we believe in the power of resharing. Dive into our treasure trove of articles, videos, and insights that have wowed countless readers. Whether it’s a loom knitting tutorial, an intriguing new loom video, or a a new technique, we know that great content deserves a second, third, or even fourth look.

Huntington Vistas Shawl: stitch video demonstration

This pattern was originally released in April of 2019 on the KB Blog. At the time, the pattern didn’t have a video, a customer reached out recently looking for a video. I found myself with some time on my hands and a yearning to learn how to use Premiere Pro, so I embarked on creating a short video to demonstrate the stitch pattern row. Please note: this is not a video of the entire project, only a video showing what to do for the lace row (row 31). I hope you enjoy it.

PS: I don’t really do much loom knitting anymore. I thank you for coming by to visit.


Loom knit a beautiful shawl using the All-n-One knitting loom. The gorgeous and sumptuous yarn has you reaching for new colors to bring to life the colors at the beach.

LOOM:  The pattern was created using the All-n-One Loom with 5-peg slider. Need a total of 98 pegs. I would actually recommend to use the new Flexee Links Regular to create this pattern.

YARN:  Approx 820 yds of worsted weight, 100% Superwash Merino Wool.
Knit Picks Twill, 149 yds | 100 grams, was used in the sample–Colors: Dungaree (1 skein), Overcast (3 skeins), Horchata Heather (1 skein). Red Heart Chic Sheep Yarn in color Lace (1 skein).

NOTIONS:  tapestry needle, row counter (optional).

SIZE: Approx 20″ wide by 52″ long after steam blocking.

Notes: you can easily create this using only one color of yarn and skip all the color changes. If this is your first time working lace, I would recommend to only focus on one color to make it as simple as possible.

ABBREVIATIONS

k=knit stitch 

p=purl stitch

st(s)=stitch(es) 

rep=repeat

k2tog=knit two stitches together, right slanting

ssk=knit two stitches together left slanting

yo=yarn over

approx=approximately

YARN COLOR ABBREVIATIONS

B=Horchata Heather

W=Lace

S=Overcast

N=Dungaree

SUGGESTION: Familiarize with the lace-stitch pattern section, rows 29-32, before beginning the project.

Video demonstration:

Help Support this Blog

INSTRUCTIONS

With B, cast on 98 sts, prepare to work a flat panel and ensure the first row will go from Right to Left direction (clockwise around the loom)

Row 1-12: *k1, p1; rep from * to end of row.

Row 13: k to end of row.

Row 14: p to end of row.

Join W; do not cut B.

Row 15: using W, k to end of row.

Row 16: using W, p to end of row.

Row 17: using B, k to end of row.

Row 18: using B, p to end of row.

Row 19: using W, k to end of row.

Row 20: using W, p to end of row.

Join S; cut B leaving a 6-inch yarn tail.

Row 21: using S, k to end of row.

Row 22: using S, p to end of row.

Row 23: using W, k to end of row.

Row 24: using W, p to end of row.

Row 25: using S, k to end of row.

Row 26: using S, p to end of row.

Row 27: using W, k to end of row.

Row 28: using W, p to end of row.

Cut W leaving a 6-inch yarn tail.

The lace section that follows will be done completely using S.

Row 29: k to end of row.

Row 30: p4, k90, p4. (Work this row very loosely)

Row 31: k4, *[k2tog] 3 times, [yo, k1] 6 times, [ssk] 3 times; rep from * to last 4 sts, k4.

Row 32: p to end of row.

Repeat Rows 29-32: 29 more times.

Join N; do not cut S.

Next row: using N, k to end of row.

Next row: using N, p to end of row.

Next row: using S, k to end of row.

Next row: using S, p to end of row.

Repeat last 4 rows: 12 more times.

Next row: using N, k to end of row.

Next row: using N, p to end of row.

Cut N leaving a 6-inch yarn tail.

Next row: k to end of row.

Next row: p4, k90, p4. (Work this row very loosely)

Next row: k4, *[k2tog] 3 times, [yo, k1] 6 times, [ssk] 3 times; rep from * to last 4 sts, k4.

Next row: p to end of row.

Repeat last 4 rows: 29 more times.

Next row: k to end of row.

Next row: p4, k90, p4.

Join W.

Next row: using W, k to end of row.

Next row: using W, p to end of row.

Next row: using S, k to end of row.

Next row: using S, p to end of row.

Next row: using W, k to end of row.

Next row: using W, p to end of row.

Next row: using S, k to end of row.

Next row: using S, p to end of row.

Join B; cut S leaving a 6-inch yarn tail end.

Next row: using W, k to end of row.

Next row: using W, p to end of row.

Next row: using B, k to end of row.

Next row: using B, p to end of row.

Next row: using W, k to end of row.

Next row: using W, p to end of row.

Cut W leaving a 6-inch yarn tail end.

Next row: using B, k to end of row.

Next row: using B, p to end of row.

Next 12 rows: *k1, p1; rep from * to end of row.

Bind off with Basic Bind Off method in pattern.

Weave in all yarn tail ends. Steam block or wet block to open up the lace stitches.

Double Knit Simple Cable Scarf

This pattern was released in 2005-2006. Re-sharing it after my friend, Monica Kersten Nicolescu, used the pattern to create a beautiful scarf for her, and another for her husband. It is definitely an old pattern, the sample used a DA Looms (no longer in existence), but still one of my favorite looms due to the softness of the pegs. The instructions below are from my PDF. The knitting loom shown on the photos is the DA Looms knitting board, but all the other double-knit looms should work for the pattern (make sure you use a yarn that works with the gauge of your loom).

A simple ribbing and cable scarf done on a knitting board. Perfect way to begin your journey creating cables on a knitting loom.

Note: I don’t double knit very often anymore. I used to do it when my husband owned DA Looms, but I gave it up when I didn’t have to provide customer service for it.

The following photos are shared with permission from Monica Kersten Nicolescu. Copyright of these three photos belong to her. She created her design with 3 cables, rather than the 2 in my pattern.

Level: Experienced Knitting Board Techniques used

Check How-To page for instructions on ribbing (bottom of this post).

Materials:
Knitting loom: 12” Small Gauge Knitting Board.
Yarn: Approx 350-400 yards of worsted weight merino wool. Sample was worked with Patons Merino Wool (2 skeins).
Notions: Knitting Pick/Tool, 2 Crochet Hooks of different color in size to match yarn, 4 peg/stitch markers/ spare yarn in different color

Skills Set:
• Knitting on a knitting board.
• Ribbing on Knitting Board.
• Comfortable moving stitches from one side of the board to the other.

Recommendations:
I highly recommend using a nylon pegged board for this pattern, as the crossing of cables requires the pegs to bend a bit.

For this pattern, choose a yarn that has some inherent elasticity, such as wool or a wool blend, to facilitate the twists in the cables.

Note: Wrap very loosely.

INSTRUCTIONS

Prep Loom:

Place the 4 stitch markers on the following pegs:

Peg 3, Peg 6, Peg 9, Peg 12. (On the front rail (the rail closest to you)).

The 4 pegs from stitch marker to stitch marker will be used to cross the cables:

Cable 1: Peg 3-6.

Cable 2: Peg 9-12

Set up row: Cast-on 14 pegs with the Lucet Cast On Method (or any other method of your choice for double knitting).

Each side of your knitting board should have 14 pegs covered for a total of 28 pegs.

Rows 1- 4: Knit rib stitch (refer to the How-To Page for a diagram on how to knit the Rib Stitch).

Before working Row 5, move the stitches to create the cables, I call this step the “set up for cable crossing” (part of row 5). Note: Only done on one side of the board (the front side (the side closest to you)).

First cable:

Cable Step 1: On the side closest to you, remove the loops from peg 6 & 5, place them on peg 6 &5 on the opposite side/the back rail (they are being held there momentarily).

Cable Step 2: With knitting tool, remove the loop from peg 4 (from side closest to you), place it on empty peg 6.

Cable Step 3: Move the loop from peg 3 over to empty peg 5.

Cable Step 4: Place the loop that was on peg 5 on empty peg 3.

Cable Step 5: Place the loop that was on peg 6 on peg 4. One cable crossed completed.

Second cable:

Step 1: (On side closest to you) Remove the loops from peg 11 & 12 and place them on pegs 11 & 12 on the opposite side/back rail (they are being held there momentarily.

Step 2: With knitting tool, remove the loop from peg 10, place it on empty peg 12.

Step 3: Move the loop from peg 9 over to empty peg 11.

Step 4: Place the loop that was on peg 12 on empty peg 10.

Step 5: Place the loop that was on peg 11 on empty peg 9. 2nd Cable Crossed complete.

Row 5: Wrap & Knit in Rib Stitch. Rows 1-5 make 1 cable repeat.

Repeat rows 1-5: until you reach the desired length. 1 Skein of Patons Merino Wool gives a length of about 3 feet long, in general, a scarf should be as long as the person wearing it is tall.

Remove from the loom after a Row 4 is completed.

Bind off/Remove with the flat removal method. You may add fringes to the scarf to add more length.

The right side of the scarf will show the cables, the reverse side will show the rib stitch.

PHOTOS FOR ADDITIONAL ASSISTANCE IN THE CABLE CROSSING

Pick up the stitches for the cables: you will be using the two crochet hooks for this process.
Crossing the first set of cables (crochet hook A).
Crossing of second set of cables (crochet hook B).
Close-up after cable crossing.
View of both cables crossed. Note how the pegs tend to come close to each other. For this reason, I recommend wrapping very loosely. The pegs will tend to come together when the crossing of the cables, but this changes as you keep on knitting.

KNITTING BOARD BASICS

Rib Wrap: Start at top 1st peg, down to lower 3rd peg. Continue wrapping every other peg until the necessary number of stitches are covered. Turn the board around, and continue by covering all the empty pegs.

Removal Method/Bind Off:

Step 1: Remove all the loops from top row off the board to the bottom row. Top row should be completely empty. Bottom row should have 2 loops on each peg. Knit over by lifting the bottom loop off the peg, thus leaving only 1 loop on each peg.

Step 2: Starting at the opposite end from where working yarn is located (Assume is peg 8).

Remove the loop before the last peg (peg 7 on bottom row) place it on peg 8. Now, you have 2 loops on peg 8, peg 7 is empty. Knit over on peg 8. Move the loop left on peg 8 to peg 7. Move loop from peg 6 to peg 7, now you have 2 loops on peg 7, knit over. Move loop left on peg 7 to empty peg 6. Continue to the end of the row. When you reach the last peg, cut the working yarn, leaving a 5 inch tail. Remove the last loop from the peg, and grab the working yarn with your crochet hook and pass it through the last loop you removed make a tight knot.

Weave all your yarn tail ends into your work.

Loom Knit Stitches: Little Chevron & Cable Twist Stitch

After releasing the Little Chevron Cowl & Matching Hat, I had numerous requests for the stitch pattern to be provided for a flat panel to create a shawl or a scarf. While I don’t have a shawl pattern for you, or even a scarf pattern, I did sit down and created a video on the how-tos of getting the stitch done as a flat panel.

The video is below, but if you are like me, I much rather have written instructions, or even better–just give me a chart. If you have the chart, you really don’t need much else–print it out and go to town with it.

WRITTEN:

Abbreviations:
k=knit (u-stitch, or true knit stitch)

p=purl

ssk=slip, slip knit

k2tog=knit two stitches together

yo=yarn over

LC=Left Cross (Access my cable tutorial)

INSTRUCTIONS

Row 1: *k1, k2tog, yo, k1, yo, ssk, k1, p1, k2, p1; rep from * to last 7 sts, k1, k2tog, yo, k1, yo, ssk, k1.

Row 2: *k7, p1, k2, p1; rep from * to last 7 sts, k7.

Row 3: *k2tog, yo, k3, yo, ssk, p1, LC, p1, rep from * to last 7 sts, k2tog, yo, k3, yo, ssk.

Row 4: *k7, p1, k2, p1; rep from * to last 7 sts, k7.

Repeat Rows 1-4.

CHART

The stitch pattern is a multiple of 11+7 stitches | Over 4 rows.

The stitch pattern is a combination of 2 stitch patterns that I combined–the small chevron on the right, followed by a cable twist. Could it have been different? Definitely–you could change it so you start with the cable and end with a cable. I wanted mine to start with a lace section and end with a lace section.

IMPORTANT NOTE ABOUT THE VIDEO: The stitch pattern in the video is encased in garter stitch edges. The video does not show the creation of the garter stitch edges. As such, you are welcome to put an edging of your desire onto whatever it is that you are creating. The edging can be garter, seed, another lace edging, etc.

Little Bear Hat…take 2

My little one wanted another Little Bear Hat in a white color. As I went looking through my yarn, I found a super soft and squishy yarn. It was unfortunately not a weight #6 but a #5. I knew it was going to be smaller, but I didn’t realize that it was going to be so much smaller than the other. Well, the hat that came out was definitely not for a 5 year old, maybe a 1-2 year old. Consequently, I had to rework the pattern with more pegs, 54 pegs to be exact. The hat though is amazingly soft! It is perfect for little heads that dislike the “scratchiness” of wool. The hat is pretty much created the same way except with more pegs and more crown decreases.

Loom Knitted Little Bear Hat, white color

Lesson learned: definitely always swatch.

So, if you want a little hat, work the regular Little Bear Hat with #5 weight yarn. But if you want it still for a toddler, then follow the directions below. If you are not familiar with the pattern, I recommend watching the video (for the original Little Bear Hat).

Loom knitted Little Bear Hats

MATERIALS

Knitting loom: Flexee links chunky, sample was worked on 27 links (54 pegs)

Yarn: Approximately 100 yards of bulky weight wool blend yarn, #5. K + C Luxe Craft Angel Hair in White was used in sample (3.5oz/110 yds)

Notions: Knitting tool, Tapestry needle, Scissors.

Gauge: 6 sts x 8.5 rows=2 inches in stockinette

Size: fits up to a head circumference of 19″

ABBREVIATIONS

K=Knit stitch (true knit stitch, or u-wrap)

P=Purl stitch

St(s)=Stitch(es)

Approx=Approximate

Rnd(s)=Round(s)

Ssk=slip, slip knit. A decrease. Move the stitch from the second peg and place it on the first peg. Peg 1 has 2 loops, work both loops as one.

INSTRUCTIONS

HAT

Assemble 27 links into a circle configuration (54 pegs).

Cast on 54 stitches, prepare to work in the round.

Rnd 1-6: *k1, p1; rep from * to end.

Rnd 7: k to end.

Repeat Round 7 until hat measures approx 4.25″ from cast on edge.

Next rnd (decrease round): *ssk, k7; rep from * to end. (Remove the links as they become emptied).

Next rnd: k to end.

Next rnd (decrease round): *ssk, k6; rep from * to end. (Remove the links as they become emptied).

Next rnd: k to end.

Next rnd (decrease round): *ssk, k5; rep from * to end. (Remove the links as they become emptied).

Next rnd: k to end.

Next rnd (decrease round): *skk; k4; rep from * to end. (Remove the links as they become emptied).

Next rnd: k to end.

Next rnd (decrease round): *skk; k3; rep from * to end. (Remove the links as they become emptied).

Next rnd: k to end.

Next rnd (decrease round): *skk; k2; rep from * to end. (Remove the links as they become emptied).

Next rnd: k to end.

Next rnd (decrease round): *skk; k1; rep from * to end. (Remove the links as they become emptied).

Next rnd: k to end.

Next rnd (decrease round): *skk; rep from * to end. (Remove the links as they become emptied).

Bind off with gather removal method.

Weave in all ends. Block lightly.

EARS
(Make 2)

Leave about a 10-inch of tail before the cast on.

Cast on 10 sts, prepare to work a flat panel.

Row 1, 3, 5: k to end.

Row 2, 4, 6: p to end.

Row 7: *ssk; rep from * to end. (Remove the links as they become emptied).

Row 8: k to end.

Bind off with flat removal method leaving a 10-inch yarn tail.

ASSEMBLY

Using the cast on yarn tail cinch down one side of the ear by passing the yarn tail through the purl bumps. Gently cinch it down (the ear should close on this side). Pass the yarn through the bind off area. Pass the yarn up the other side of the ear, using the purl bumps on the side. Gently cinch the ear down. Using the bind off yarn tail, secure the ear to the top of the hat.

Loom Knit: Picot Edge

I have added a new video to the techniques playlist. After working on my last cowl & hat set, I realized that I have never shared the picot edge by itself. I have demonstrated it as part of the project, but never by itself.

A picot edge provides a nice decorative edge to a knitted garment. It is frequently used on hat brims, sock cuffs, mitten cuffs, edge of sleeves, and even around necklines.

Layout of 3 knitted items with picot edging. Watermelon socks. Sample toy hat. Hat & cowl.

The video demonstrates how to create a picot edge on a knitting loom.

The knitting loom shown is the Flexee Links Chunky by KB Looms.

How to:

1. Cast on an even number of stitches.

2. Work in stockinette (any desired knit stitch you would like to use). Work the number of rounds that you desire the cuff/brim to be.

3. Work the picot round (Round 11 of sample video).

4. Work in stockinette the same number of rounds as you did prior to the Picot Round.

5. Pick up the stitches from the cast on round, place them on the pegs. Then knit one entire round.

Continue working your pattern as normal.