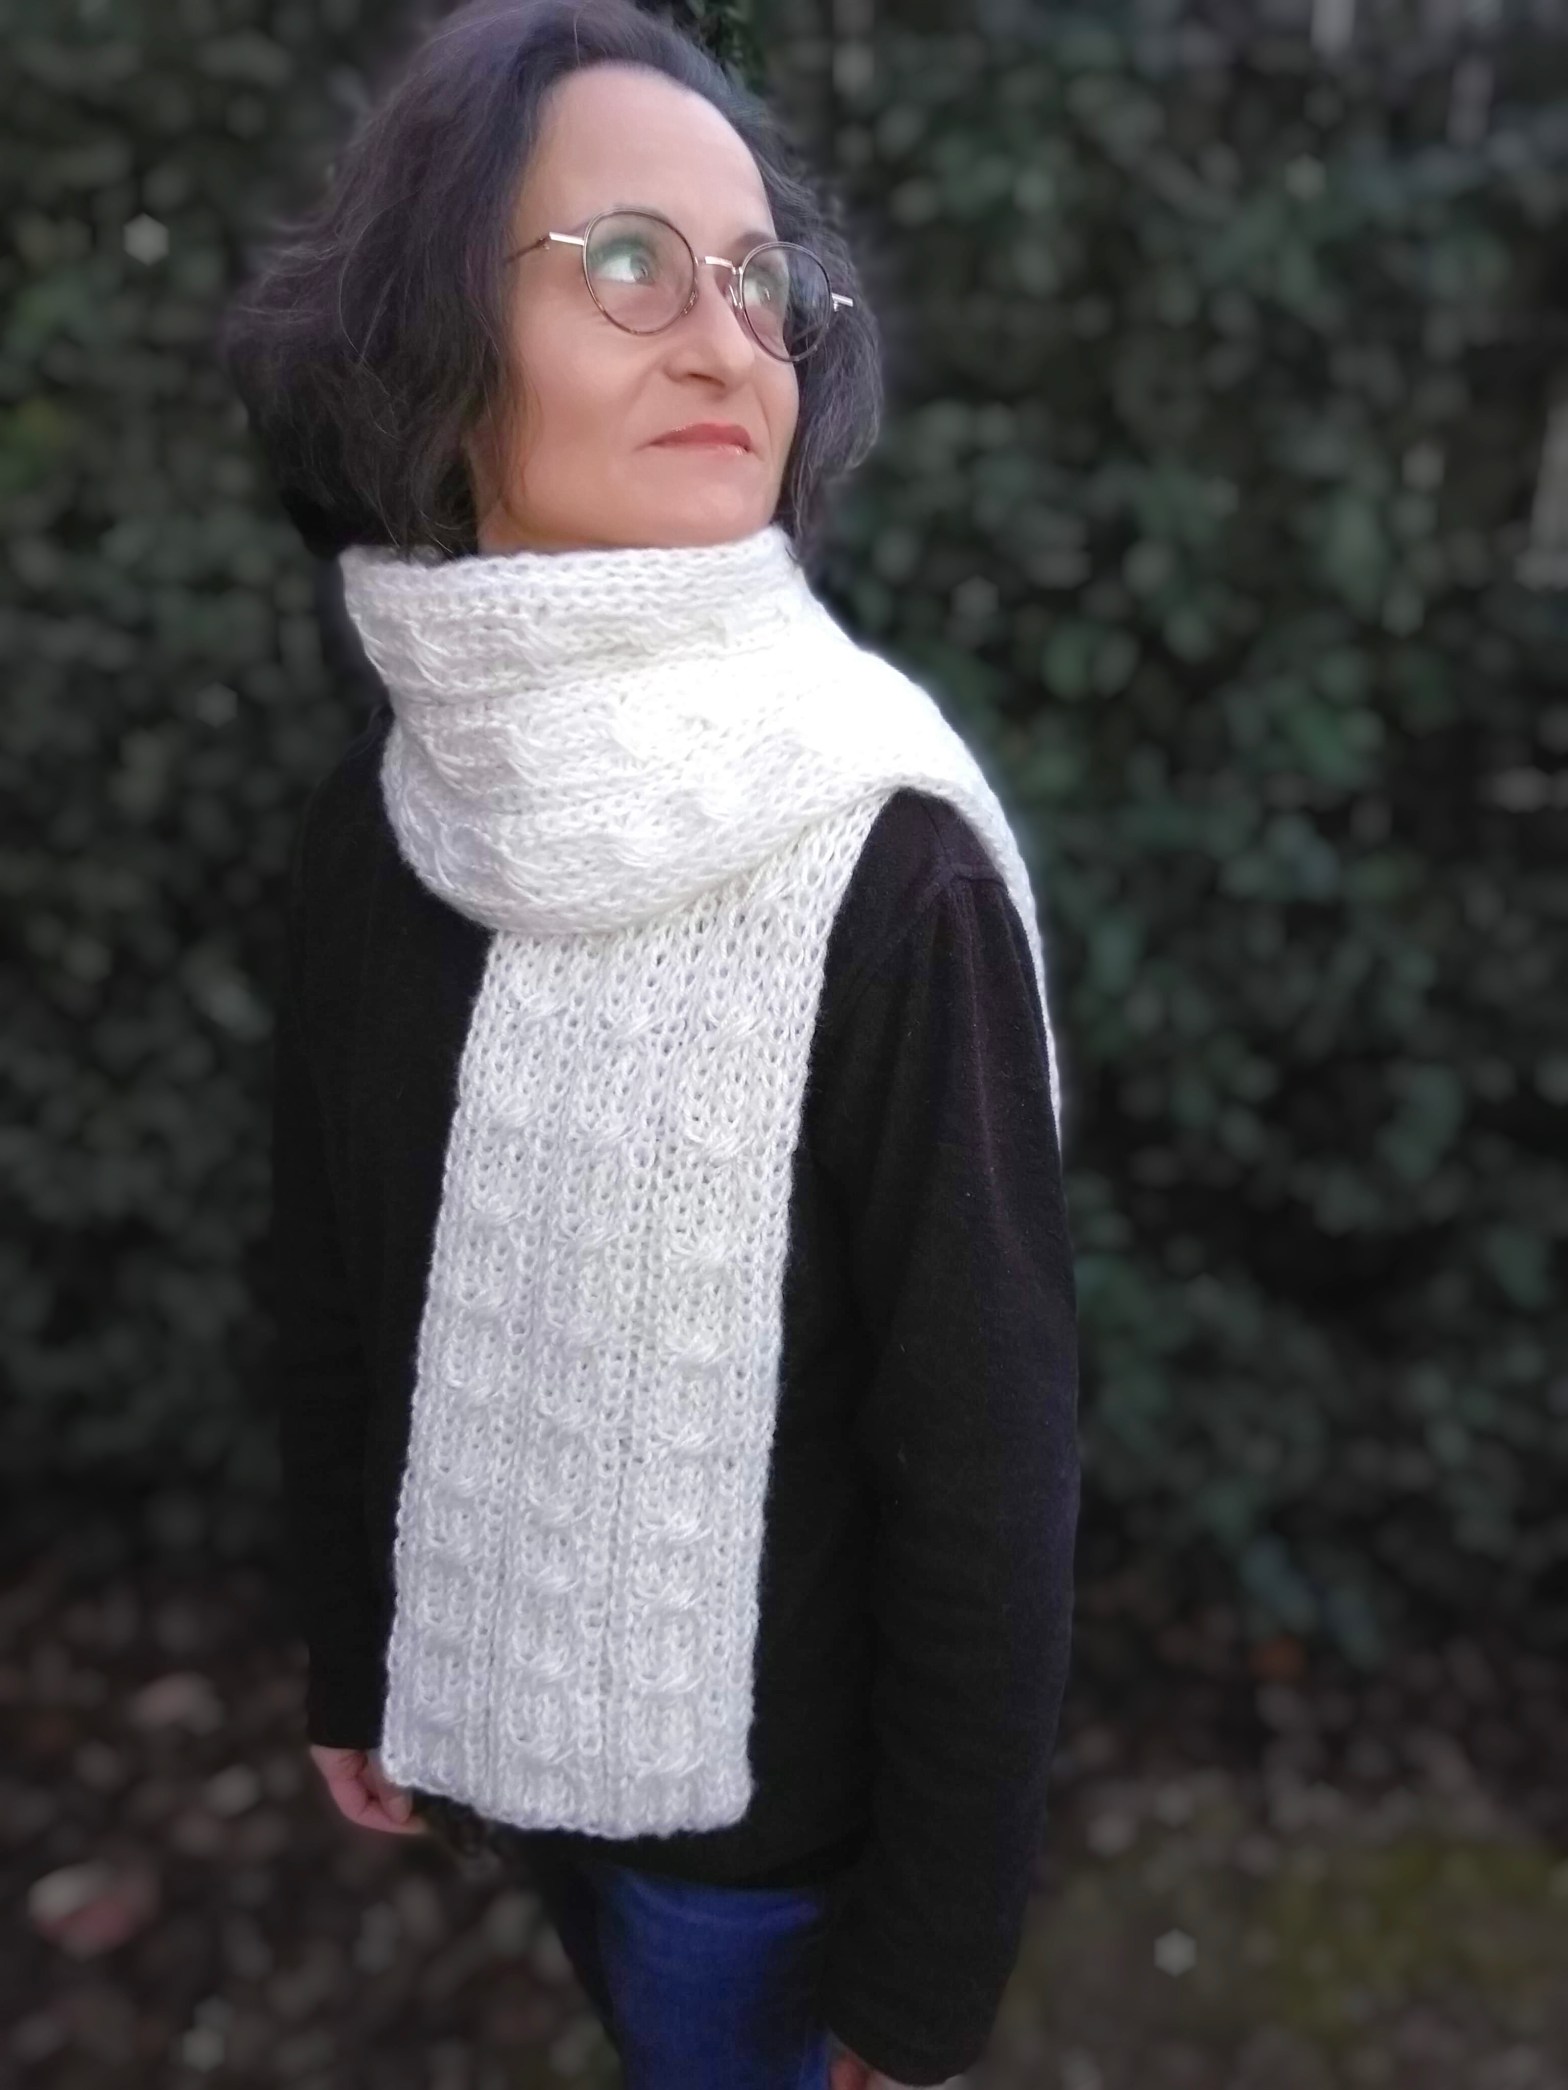

This pattern was released in 2005-2006. Re-sharing it after my friend, Monica Kersten Nicolescu, used the pattern to create a beautiful scarf for her, and another for her husband. It is definitely an old pattern, the sample used a DA Looms (no longer in existence), but still one of my favorite looms due to the softness of the pegs. The instructions below are from my PDF. The knitting loom shown on the photos is the DA Looms knitting board, but all the other double-knit looms should work for the pattern (make sure you use a yarn that works with the gauge of your loom).
A simple ribbing and cable scarf done on a knitting board. Perfect way to begin your journey creating cables on a knitting loom.
Note: I don’t double knit very often anymore. I used to do it when my husband owned DA Looms, but I gave it up when I didn’t have to provide customer service for it.
The following photos are shared with permission from Monica Kersten Nicolescu. Copyright of these three photos belong to her. She created her design with 3 cables, rather than the 2 in my pattern.


Level: Experienced Knitting Board Techniques used
Check How-To page for instructions on ribbing (bottom of this post).
Materials:
Knitting loom: 12” Small Gauge Knitting Board.
Yarn: Approx 350-400 yards of worsted weight merino wool. Sample was worked with Patons Merino Wool (2 skeins).
Notions: Knitting Pick/Tool, 2 Crochet Hooks of different color in size to match yarn, 4 peg/stitch markers/ spare yarn in different color
Skills Set:
• Knitting on a knitting board.
• Ribbing on Knitting Board.
• Comfortable moving stitches from one side of the board to the other.
Recommendations:
I highly recommend using a nylon pegged board for this pattern, as the crossing of cables requires the pegs to bend a bit.
For this pattern, choose a yarn that has some inherent elasticity, such as wool or a wool blend, to facilitate the twists in the cables.
Note: Wrap very loosely.
INSTRUCTIONS
Prep Loom:
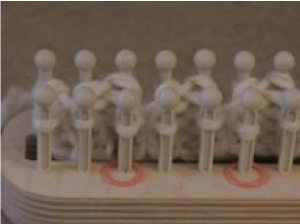
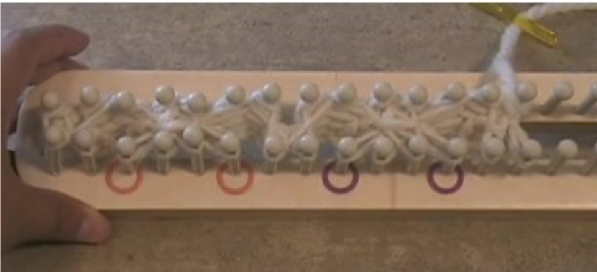
Place the 4 stitch markers on the following pegs:
Peg 3, Peg 6, Peg 9, Peg 12. (On the front rail (the rail closest to you)).

The 4 pegs from stitch marker to stitch marker will be used to cross the cables:
Cable 1: Peg 3-6.
Cable 2: Peg 9-12
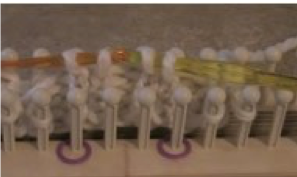
Set up row: Cast-on 14 pegs with the Lucet Cast On Method (or any other method of your choice for double knitting).
Each side of your knitting board should have 14 pegs covered for a total of 28 pegs.

Rows 1- 4: Knit rib stitch (refer to the How-To Page for a diagram on how to knit the Rib Stitch).
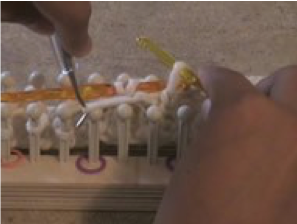
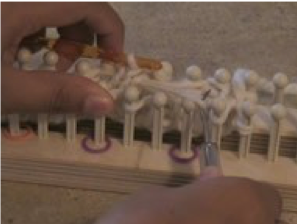
Before working Row 5, move the stitches to create the cables, I call this step the “set up for cable crossing” (part of row 5). Note: Only done on one side of the board (the front side (the side closest to you)).
First cable:
Cable Step 1: On the side closest to you, remove the loops from peg 6 & 5, place them on peg 6 &5 on the opposite side/the back rail (they are being held there momentarily).
Cable Step 2: With knitting tool, remove the loop from peg 4 (from side closest to you), place it on empty peg 6.
Cable Step 3: Move the loop from peg 3 over to empty peg 5.
Cable Step 4: Place the loop that was on peg 5 on empty peg 3.
Cable Step 5: Place the loop that was on peg 6 on peg 4. One cable crossed completed.
Second cable:
Step 1: (On side closest to you) Remove the loops from peg 11 & 12 and place them on pegs 11 & 12 on the opposite side/back rail (they are being held there momentarily.
Step 2: With knitting tool, remove the loop from peg 10, place it on empty peg 12.
Step 3: Move the loop from peg 9 over to empty peg 11.
Step 4: Place the loop that was on peg 12 on empty peg 10.
Step 5: Place the loop that was on peg 11 on empty peg 9. 2nd Cable Crossed complete.
Row 5: Wrap & Knit in Rib Stitch. Rows 1-5 make 1 cable repeat.
Repeat rows 1-5: until you reach the desired length. 1 Skein of Patons Merino Wool gives a length of about 3 feet long, in general, a scarf should be as long as the person wearing it is tall.
Remove from the loom after a Row 4 is completed.
Bind off/Remove with the flat removal method. You may add fringes to the scarf to add more length.
The right side of the scarf will show the cables, the reverse side will show the rib stitch.

PHOTOS FOR ADDITIONAL ASSISTANCE IN THE CABLE CROSSING


KNITTING BOARD BASICS
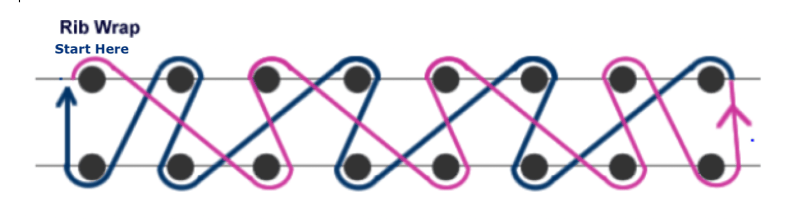
Rib Wrap: Start at top 1st peg, down to lower 3rd peg. Continue wrapping every other peg until the necessary number of stitches are covered. Turn the board around, and continue by covering all the empty pegs.
Removal Method/Bind Off:
Step 1: Remove all the loops from top row off the board to the bottom row. Top row should be completely empty. Bottom row should have 2 loops on each peg. Knit over by lifting the bottom loop off the peg, thus leaving only 1 loop on each peg.

Step 2: Starting at the opposite end from where working yarn is located (Assume is peg 8).
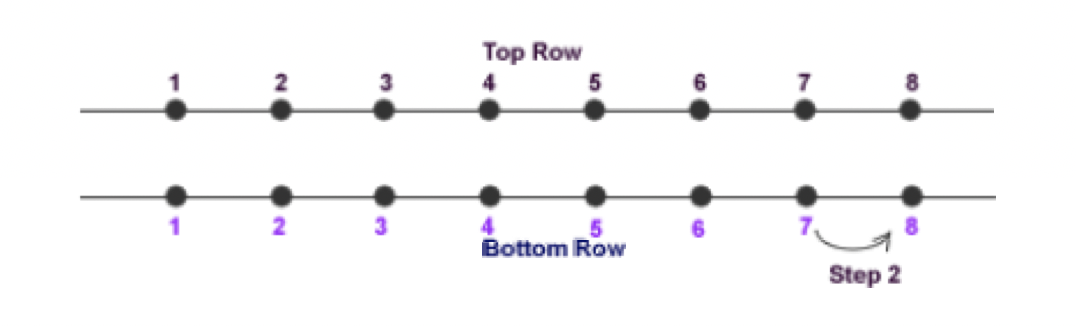
Remove the loop before the last peg (peg 7 on bottom row) place it on peg 8. Now, you have 2 loops on peg 8, peg 7 is empty. Knit over on peg 8. Move the loop left on peg 8 to peg 7. Move loop from peg 6 to peg 7, now you have 2 loops on peg 7, knit over. Move loop left on peg 7 to empty peg 6. Continue to the end of the row. When you reach the last peg, cut the working yarn, leaving a 5 inch tail. Remove the last loop from the peg, and grab the working yarn with your crochet hook and pass it through the last loop you removed make a tight knot.
Weave all your yarn tail ends into your work.

Thank you both! Beautiful pattern & update!
LikeLike
Thank you!
LikeLike