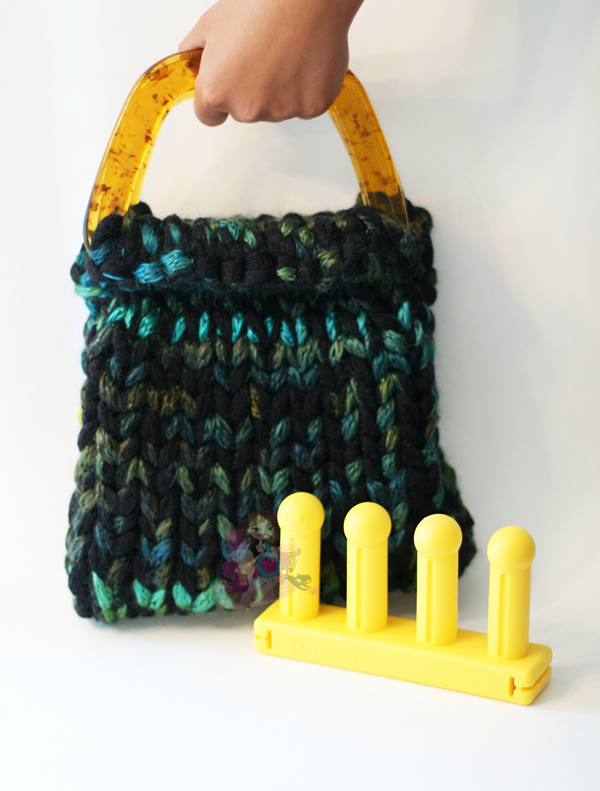
The itty bitty version of the Candy Corn bag. Click on the picture to be taken to the Ravelry pattern (free to the end of October 2015). Ravelry link.
Candy Corn Bag Free
 For a limited time, free!
Zippy Slipped Scarf
Instructions
Zippy Faux Möbius Scarf
The zippy faux möbius scarf is very simple and fast to knit. Worked completely in garter stitch and then a simple twist creates a unique scarf.
What is a möbius strip? It is a one-sided surface that is constructed from a rectangle by holding one end fixed, rotating the opposite end through 180 degrees, and joining it to the first end.
Materials
Knitting loom: Zippy loom (3 zippy looms).
Yarn: Approx: 60 yards of super bulky yarn. Loops & Threads Artisan was used in sample.
Notions: Knitting tool, tapestry needle.
Abbreviations
K=e-wrap knit stitch
P=purl stitch
CO=cast on
BBO=basic bind off
St(s)=stitch(es)
INSTRUCTIONS
Cast on 12 sts (left to right)
Row 1: k to the end of row.
Row 2: p to the end of row.
Repeat Row 1 and Row 2: 25 more times.
Twist the panel, place the cast on row back on the knitting loom. Each peg has two loops on it.Perform a basic bind off (treat the two loops on each peg as one loop).
Weave ends in.
Related articles
Zippy Necklace
Create a lovely necklace in less than 1 hour using your Zippy loom! Worked with beaded cord to create a unique and gorgeous necklace.
Materials
Knitting loom: Zippy loom.
Yarn: Approx 4 yards of beaded cord. Sample used 2 spools of cord-beaded ribbon by Simplicity.
Notions: knitting tool.
Other: 2 cord end camps, 1 small lobster claw and 2 jump rings, small pliers. Matches to burn the ends of the cord to prevent fraying.
Pattern notes:
- Worked in the knit stitch.
- To add the second strand of cord, securely join both cords with a knot. After necklace is complete, trim the ends of the knot closely to the necklace and burn the ends of the cord to prevent fraying and prevent the knot from coming undone.

INSTRUCTIONS
Leaving an 8-inch beginning yarn tail, cast on 2 stitches on the middle two pegs of the loom.
Row 1: knit to the end of row.
Row 2: Cast on 1 stitch using the half hitch cast on stitch, knit 2.
Row 3: Cast on 1 stitch using the half hitch cast on stitch, knit 2.
Row 4-10: knit to the end of the row.
Row 11: Move the stitch from peg 1 to peg 2. Knit to the end of row.
Row 12: Move the stitch peg 4 to peg 3. Knit to the end of the row.
Bind off with basic bind off method, leave an 8-inch end tail.
Note: I removed the bead cord from the beginning and end yarn tails.
Assembly:
Using the matches, burn the ends of the cord to prevent it from fraying.
Place and end cap at each end of the cord, securely tighten using the pliers. Connect a small jump ring to one end cap and securely tighten with pliers. Connect a small jump ring to the other end cap, before closing the jump ring, add the lobster claw to this jump ring too; securely tighten the jump ring.
On Socks & Looming
The world of loom knitting is blooming and hundreds of loom knitters are joining the ranks every day. With such growth comes questions that we may have addressed before but never really put them down on paper. I have gathered the following information over the years and a lot of it came from doing the work for one of my books. I hope you find the following tables useful. If you would like me to add anything else to this document, please let me know and I will do my best to add it.
Zippy Iva Headband
The Zippy Iva Headband is modeled after the double knit Iva Headband, modeled after it, it splits in the middle to create the accent at the forehead. Worked on the Zippy loom with super bulky yarn in less than 30 minutes!
Knitting loom: Zippy loom (2 Zippy looms, connected together).
Yarn: Approx 20 yds of super bulky acrylic yarn. Sample used Bernat Mega Bulky (1 skein in Claret color).
Notions: knitting tool, big eye tapestry needle.
Size: fits up to 21 inch head.
Gauge: 5 sts x 9 rows= 4 inches (in stockinette, using the Knit Stitch/U Stitch).
Other: hair elastic (pony holder)
Pattern notes:
Connect the two Zippy looms together. Sample is worked with the U-stitch not the ewrap stitch.
Position the stitches at the middle of the knitting loom to have empty pegs at each end.
Cast on 4 stitches
Row 1-8: knit to end of row.
Row 9: Increase at the beginning of the row (ewrap the empty peg to the right). Knit to the end of row. (5 stitches)
Row 10: Increase at the beginning of the row (ewrap the empty peg to the left). Knit to the end of the row. (6 stitches)
Row 11-18: knit to the end of row.
Work the next 4 rows on ONLY the first 3 pegs.
Next 4 rows: knit to the end of row.
Attach yarn to peg 4 (make a slip knot and place it on peg 4.
Work the next 4 rows on ONLY the last 3 pegs.
Next 4 rows: knit to end of row. Cut yarn leaving a 6 inch tail.
Remove the first 3 stitches off the loom and hold them on a stitch holder. Move stitch from peg 4 and place it on peg 1. Move stitch from peg 5 and place it on peg 2. Move stitch from peg 6 and place it on peg 3. Place the stitch from the stitch holder back on the loom as follows: Stitch 1 on peg 4; stitch 2 on peg 5; stitch 3 on peg 6.
Join yarn at peg 1.
Next 10 rows: knit to end of row.
Next row: Place stitch from peg 1 on peg 2. Place stitch from peg 6 on peg 5. (Pegs 2 and 5 have 2 loops each, treat these two loops as one loop). Knit to the end of row.
Next 7 rows: knit to end of row.
Bind off with basic bind off method. Leave a 6 inch yarn tail.
Using the yarn tail and the tapestry needle. Secure the pony tail elastic to the ends of the headband.
Zippy Zoom Bag
Let’s get Zipping! Create this darling bag in less than 1 hour! Super bulky yarn and the new Zippy loom will have you creating in no-time at all!
Knitting loom: Zippy loom (3 Zippy looms, connected together).
Yarn: 84 yards of Super Bulky acrylic yarn . Sample used Loops & Threads Opus (1 skein in Bermuda used) 42 yds/38m, and Rozetti Flora (1.5 skeins in Black used), 27yds/25m (this is a ruffle style yarn).
Notions: knitting tool, big eye tapestry needle.
Other: 7 inch D shape bag handles.
Size: 8 inches tall x 9 inches wide.
Gauge: 4 sts x 9 rows= 4 inches.
Pattern notes:
Connect the three Zippy looms together. Using both MC and CC together throughout.
Leave a 12 inch yarn tail of the Ewrap cast on from left to right.
Row 1: knit to the end of row.
Row 2: knit to the end of row.
Row 3: purl to the end of row.
Row 4-30: knit to the end row.
Row 31: purl to the end of row.
Row 32: knit to the end of row.
Row 33: knit to the end of row.
Bind off with basic bind off method; leave a 12 tail to use for sewing the handle in place.
Using the yarn tail at cast on edge, fold the material over the handle and sew the handle in place. Do the same at the bind off edge with the second handle.
Thread the tapestry needle with MC yarn, fold the bag (so the two handles meet) and mattress stitch seam the sides of the bag—note, start the mattress stitch about 1 inch down from the handle (if you start seaming by the handle, you won’t be able to open the bag).
Weave all ends in.
Ballerina Baby Socks
Click on the image to be taken to the pattern.
Contest time for the bloggy!
Knit a pair of the Ballerina Baby Socks and be entered to win one of my loom knitting books (I'll grab one from the stack and I'll send you one, it could be any of the various publications). Ship within the US only. *If you reside outside of the US and you would like to enter, I would be happy to mail you the book, however, you will have to pay for the shipping charges.
Details:
1. Knit a pair of Ballerina Baby Socks
2. Send me a picture to purlingspriteATgmail.com OR post a picture to Ravelry under the project (preferred method).
3. Comment below that you are 1)participating 2)completed and posted the picture
Deadline: June 15, 2015
Multiple entries are allowed. The more you knit, the more entries you will have.
Latest Knits!
Hi everyone,
Just want to show you some of my latest knits. They are all housed at the KB Looms blog and you can also find them on Ravelry and add them to your queue. Click on the image to be taken to the pattern on Ravelry and put them in your queue.


